
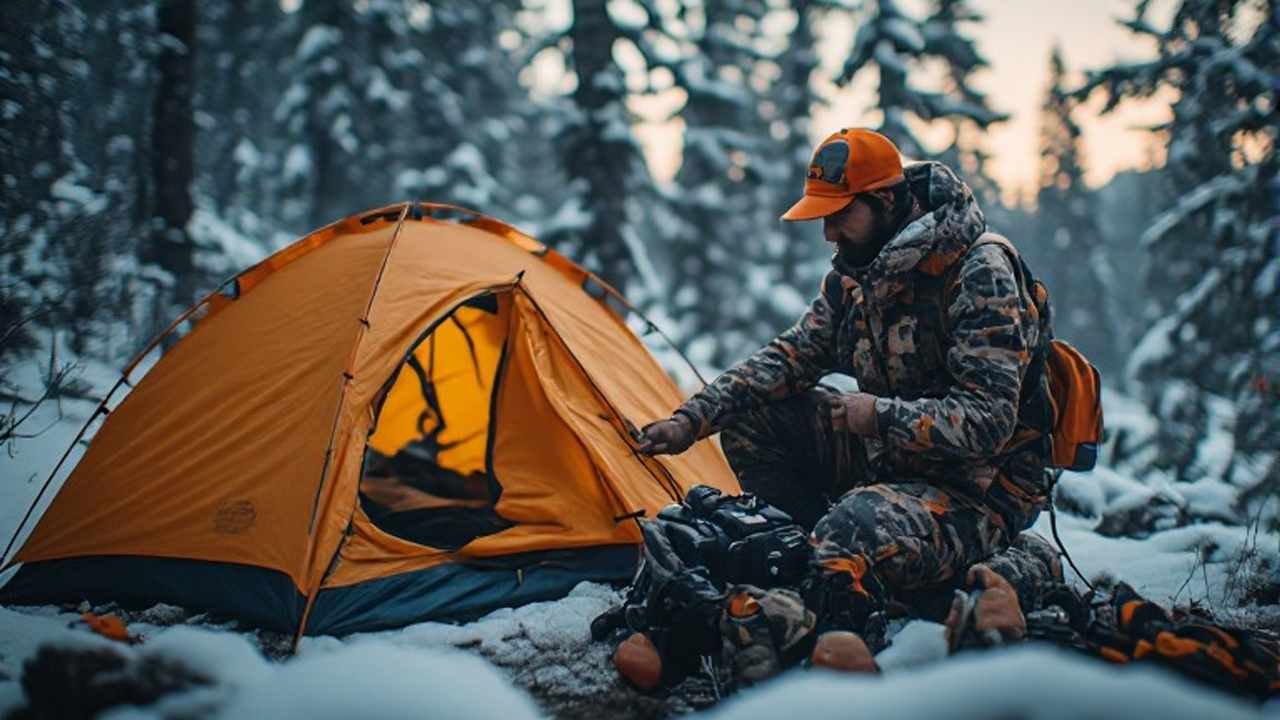
Camping & Backcountry Survival for Hunters in Canada: The Complete Safety Guide
Camping and backcountry survival for hunters in Canada depends on preparation, not luck. A reliable plan combines weather-ready clothing, shelter, water treatment, navigation, emergency communication, first aid, bear awareness, food and meat management, and a clear decision-making system. Hunters should also adapt their equipment to the province, season, terrain, distance from roads, and expected recovery workload.
A successful hunt is not measured only by harvesting game. It also means returning safely after a cold night, an injury, a sudden snowstorm, a navigation mistake, or a delayed extraction. The following guide explains what to pack, how to establish a safer remote camp, and what to do when conditions change quickly.
What Makes Canadian Backcountry Hunts Different?
Remote hunting in Canada creates risks that are easy to underestimate. A short walk on a map can become a full-day route when the terrain includes muskeg, scree, dense bush, steep ridges, fallen timber, or river crossings.
| Canadian challenge | Why it matters to hunters | Practical response |
|---|---|---|
| Rapid weather changes | Rain, wind, snow and freezing temperatures can arrive outside the normal forecast | Carry waterproof layers, spare insulation and a shelter system that works when wet |
| Long distances from roads | Help may take hours or days to reach you | File a trip plan and carry a satellite communicator |
| Heavy meat loads | A successful harvest can turn a light pack into a difficult carry | Plan pack-out routes, game bags, food calories and extra time |
| Bear country | Blood, meat, hide and food can attract wildlife | Separate sleeping, cooking and meat-storage areas |
| Limited cell coverage | A phone may be useful only near highways or high ground | Use satellite messaging as the primary emergency option |
| Short daylight windows | Late-season hunts often involve darkness during travel | Pack multiple light sources and avoid unnecessary night movement |
| Wet ground and muskeg | Moisture quickly reduces warmth and damages equipment | Use waterproof pack liners, dry bags and insulated footwear |
| Provincial regulations | Seasons, tags, firearm rules and access requirements differ | Confirm current rules before entering the field |
Start With a Risk Assessment Before Packing
Do not begin with a gear list. Begin with the route and the consequences of failure.
Evaluate these factors
- Location: Identify the nearest road, airstrip, trailhead, cabin, water crossing and emergency access point.
- Terrain: Note elevation gain, avalanche exposure, cliffs, glaciers, dense forest and wetlands.
- Season: September mountain conditions differ sharply from November conditions in northern Ontario, Alberta or British Columbia.
- Group size: A solo hunter needs an independent communication and shelter plan. A group can share some equipment but should not share every critical item.
- Target species: Moose, elk, caribou, deer and bear hunts create different distances, loads and field-processing demands.
- Extraction plan: Decide how an injured person, meat load or damaged vehicle will leave the area.
- Weather margin: Build at least one weather day into remote trips where possible.
- Medical risks: Consider allergies, asthma, diabetes, previous injuries, medication and fitness level.
Use a simple go/no-go matrix
| Condition | Continue with caution | Stop or change the plan |
|---|---|---|
| Forecast | Stable weather for the next 24–48 hours | Freezing rain, severe wind, blizzard or fast temperature drop |
| Visibility | Clear route and reliable landmarks | Whiteout, heavy fog or darkness before camp |
| Communication | Satellite device tested and charged | No working communication method |
| Physical condition | Warm, hydrated and moving well | Confusion, uncontrollable shivering, exhaustion or injury |
| Navigation | Route matches the map and terrain | Lost, off-route or unable to identify safe return travel |
| Water | Reliable treatment option available | No known water and insufficient carried supply |
| Camp | Dry shelter site with safe cooking area | Flood-prone ground, dead trees overhead or exposed ridge |
| Game recovery | Enough daylight, food and pack capacity | Recovery would force unsafe travel or a delayed return |
The Canadian Hunter’s Essential Gear System
Organize equipment by function instead of tossing everything into one large pack. Critical items should remain accessible even if the main pack is lost, soaked or separated from you.
1. Personal emergency kit
Keep these items on your body or in a small belt pouch:
- Pealess whistle
- Waterproof lighter and stormproof matches
- Compact fire starter
- Small compass
- Folding knife or fixed-blade knife
- Headlamp with spare batteries
- Emergency blanket
- Bright orange signal panel or heavy-duty orange bag
- Two energy bars
- Small water-purification backup
- Personal medication
- Identification and emergency contact card
- Waterproof phone case
- Small roll of repair tape
A shared group kit is useful, but every hunter should carry independent fire, navigation, signalling and communication equipment.
2. Shelter and sleep system
| Item | Minimum requirement | Canadian upgrade |
|---|---|---|
| Tent or shelter | Fully enclosed, weather-resistant shelter | Four-season or strong three-season tent depending on location |
| Sleeping bag or quilt | Rated below the expected overnight low | Add a safety margin rather than relying on the rating alone |
| Sleeping pad | Insulated pad with a repair kit | Use a high-R-value pad during late-season hunts |
| Ground protection | Footprint or lightweight groundsheet | Add a waterproof bivy for emergency use |
| Tarp | Compact rain and gear shelter | Choose a bright or visible colour for signalling |
| Dry bags | Separate sleeping gear from wet equipment | Use colour-coded bags for faster camp organization |
| Camp footwear | Lightweight dry footwear | Keep boots dry and allow feet to recover overnight |
Never rely on the forecast alone for warmth. Wind, damp clothing, fatigue and poor nutrition can make a mild night dangerous.
3. Clothing and footwear
Use a layered system that continues working when one layer becomes wet.
- Moisture-wicking base layer
- Merino wool or synthetic insulation layer
- Fleece or lightweight active insulation
- Puffy jacket for stationary glassing
- Waterproof and breathable shell
- Rain pants
- Warm toque or beanie
- Insulated gloves plus spare liners
- Neck gaiter
- Two or three pairs of wool or synthetic socks
- Gaiters for snow, mud and wet brush
- Broken-in boots with reliable ankle support
- Camp socks stored in a dry bag
- Blister treatment and foot tape
Avoid cotton in cold or wet conditions. It absorbs moisture, dries slowly and loses insulating ability.
For detailed seasonal planning, review this Canadian hunting gear guide by climate and season before finalizing your clothing system.
4. Water, food and cooking
| Requirement | Recommended approach |
|---|---|
| Daily drinking water | Carry enough to cover dry stretches and route delays |
| Water filter | Use a field-repairable filter suitable for cold conditions |
| Backup treatment | Pack tablets or a chemical purifier |
| Boiling option | Carry a stove and metal pot or cup |
| Fuel | Bring enough for hot drinks, meals and extra melting or boiling |
| Electrolytes | Add drink mix for long carries and heavy sweating |
| Food | Choose high-calorie, low-weight meals with simple preparation |
| Emergency ration | Keep one full day of food separate from normal meals |
| Waste storage | Carry sealable bags for rubbish and used packaging |
A demanding hunt can require more food than expected. High-value options include:
- Oatmeal
- Tortillas
- Nut butter
- Hard cheese
- Jerky
- Dehydrated meals
- Trail mix
- Energy gels
- Instant rice or noodles
- Chocolate
- Electrolyte powder
- Instant coffee or tea
Do not depend on wild food, fishing or trapping for basic survival. Those activities require time, skill and suitable conditions. Your carried food should cover the planned trip plus an emergency margin.
Navigation and Emergency Communication
A phone is not a complete navigation or rescue system. Batteries fail, screens break and coverage disappears quickly in remote areas.
Carry at least two navigation methods
- Waterproof topographic map
- Baseplate compass
- GPS unit or offline mapping application
- Spare batteries or power bank
- Marked waypoints for camp, vehicle and water
- Printed route description
- Bright tape or biodegradable markers used only where permitted
- Watch with an offline navigation function
Carry a dedicated emergency communication device
A satellite messenger or satellite phone can support:
- Two-way text communication
- Location sharing
- Weather updates
- Check-in messages
- Emergency SOS activation
- Search-and-rescue coordination
Before leaving, test the device outside with a clear view of the sky. Confirm its subscription, charge level, contact list and emergency instructions. Tell someone exactly when you expect to return.
Trip-plan checklist
Give a trusted person:
- Names of all hunters
- Vehicle description and license plate
- Trailhead or aircraft drop-off location
- Planned route
- Camp coordinates
- Target species and hunting area
- Departure and return times
- Satellite device contact details
- Emergency medical information
- The exact point when they should contact authorities
A trip plan is only useful if someone understands when to act. “Call if we are late” is vague. “Contact emergency services if we have not checked in by 8 p.m. the next day” is actionable.
How to Choose and Set Up a Safer Hunting Camp
The best camp location balances shelter, drainage, water access, wildlife awareness and a reasonable distance from the hunting area.
Inspect the site before unloading
Choose ground that is:
- Above the high-water mark
- Naturally drained
- Protected from strong prevailing wind
- Away from avalanche paths and rockfall
- Clear of dead branches and unstable trees
- Not directly beside a game trail
- Not positioned in thick berry patches or heavy animal sign
- Close enough to water for practical access
- Far enough from water to avoid flooding and insects
- Large enough to organize gear without blocking exits
Create three separate zones
| Zone | Purpose | Key rule |
|---|---|---|
| Sleeping area | Tent, clothing and personal equipment | Keep food, garbage and meat away |
| Cooking area | Stove, meals and washing | Clean spills immediately |
| Meat and equipment area | Game bags, hide, tools and pack-out supplies | Keep downwind and away from the sleeping zone |
Never leave food scraps beside camp. Burned packaging and grease can still attract wildlife, and open fires may be restricted or unsafe.
For national park trips, follow Parks Canada bear-safety and backcountry camping guidance and obey local storage requirements.
Bear Safety for Hunters
Hunters face an additional bear risk because blood, entrails, meat and hides create strong attractants. A bear encounter near a carcass can become more serious than a normal trail encounter.
Before walking into bear country
- Carry bear spray where you can reach it immediately.
- Check the spray’s expiry date and practise removing the safety clip.
- Make noise in dense vegetation and near streams.
- Travel with a partner whenever possible.
- Keep dogs controlled and close.
- Watch for tracks, scat, claw marks, overturned logs and fresh carcass remains.
- Avoid approaching a fresh kill site alone.
- Keep the wind and visibility in mind when following a blood trail.
- Do not wear headphones.
- Tell the group where each person is located.
After harvesting game
- Confirm the animal is dead before approaching.
- Scan the area before field dressing.
- Keep firearms safely managed and maintain muzzle awareness.
- Work efficiently, but do not rush into unsafe terrain.
- Remove edible meat from the gut pile when practical.
- Hang meat away from the sleeping area where regulations and terrain allow.
- Mark the location clearly for your return.
- Record coordinates before leaving.
- Avoid storing meat inside the tent.
- Keep cooking clothing separate from sleeping clothing if possible.
- Check the area from a distance before returning to a carcass.
If you see a bear
- Stop.
- Stay calm.
- Do not run.
- Speak in a steady voice.
- Slowly create distance.
- Keep bear spray ready.
- Give the animal an escape route.
- Avoid dropping food as a distraction.
- Do not approach cubs, a carcass or a feeding bear.
- Report the encounter to the relevant park or wildlife authority when required.
The correct response depends on the animal’s behavior and the circumstances. Read local guidance before your trip and practice the actions rather than relying on memory during a stressful encounter.
Staying safe in remote backcountry starts with reliable shelter, fire, and first-aid skills. For navigating unfamiliar terrain, be sure to check out our province-by-province guide to mapping and GPS tools to keep you on track.
Field Dressing, Meat Care and Pack-Out Safety
A successful harvest changes the survival problem. You now have a heavy load, a scent-producing campsite and a more demanding route home.
Meat-care priorities
| Priority | Action |
|---|---|
| Cooling | Open the body cavity and remove heat as soon as safely possible |
| Cleanliness | Keep meat away from dirt, hair, digestive contents and standing water |
| Airflow | Use breathable game bags rather than sealed plastic for warm meat |
| Shade | Hang or place meat where air can circulate and direct sun is limited |
| Insects | Use clean game bags and protect exposed cuts |
| Wildlife | Keep meat away from the tent and monitor the area |
| Transport | Divide the load realistically among hunters |
| Timing | Plan pack-out during cooler periods when possible |
| Documentation | Keep tags, licenses and required evidence with the harvest |
Pack-out checklist
- Durable game bags
- Nitrile gloves
- Blades and sharpener
- Bone saw
- Paracord or approved hanging line
- Pack frame suited to heavy loads
- Extra food and electrolytes
- Flagging or navigation markers where legal
- Waterproof notebook or phone notes
- Cooling plan
- Emergency communication device
- Headlamp
- Spare batteries
If the route becomes unsafe, stop and reassess. Meat is valuable, but it is never worth an avoidable injury.
First Aid and Common Backcountry Emergencies
A compact first-aid pouch should match the trip rather than the number printed on the package.
Include supplies for
- Blisters and hot spots
- Cuts and punctures
- Sprains and strains
- Fractures and severe bleeding
- Burns
- Eye irritation
- Insect bites
- Allergic reactions
- Pain and fever
- Diarrhea and dehydration
- Hypothermia
- Frostbite
- Medication needs
- Improvised splints and pressure dressings
Warning signs that require immediate action
| Problem | Warning signs | First response |
|---|---|---|
| Hypothermia | Shivering, confusion, poor coordination, unusual fatigue | Stop travel, shelter the person, replace wet layers and add insulation |
| Frostbite | Numbness, pale or waxy skin, loss of feeling | Protect the area, avoid rubbing and seek medical guidance |
| Heat illness | Headache, weakness, nausea, confusion | Stop exertion, cool the person and provide fluids if alert |
| Severe bleeding | Spurting or rapidly soaking blood | Apply firm direct pressure and activate emergency communication |
| Sprain or fracture | Deformity, swelling, inability to bear weight | Stabilize, reduce movement and plan evacuation |
| Dehydration | Dark urine, dizziness, dry mouth, weakness | Rest, drink treated water and add electrolytes |
| Carbon monoxide exposure | Headache, dizziness, nausea inside shelter | Leave the shelter immediately and ventilate; never run fuel-burning equipment inside a tent |
Do not wait for symptoms to become dramatic. Early intervention makes evacuation simpler and safer.
What to Do If You Become Lost
The most common mistake is continuing to move without a confirmed route. Movement can increase distance from help and make your tracks harder to follow.
Use the STOP method
- Stop: Do not rush in a random direction.
- Think: Recall the last confirmed location.
- Observe: Look for landmarks, terrain features, tracks and safe shelter.
- Plan: Choose whether to return to the last known point or stay put.
If staying put is safer
- Activate your satellite messenger.
- Send coordinates and a concise status update.
- Build or use shelter before darkness.
- Put on dry insulation.
- Make water safe.
- Use a whistle and signal mirror.
- Create a visible signal using bright fabric.
- Conserve batteries.
- Stay near a known location rather than wandering.
- Keep a written record of time, weather and actions.
Three whistle blasts repeated at intervals can signal distress. Use sound only when it is useful; constant shouting wastes energy.
A Practical Pre-Departure Checklist
One week before
- Confirm licenses, tags, permits and access permissions.
- Check firearm or bow condition.
- Inspect tent seams, sleeping pad and rain gear.
- Test the water filter.
- Charge satellite devices and power banks.
- Review the weather trend.
- Share the trip plan.
- Check vehicle recovery equipment.
- Confirm fuel and food quantities.
- Pack spare batteries and medication.
The night before
- Fill water bottles.
- Download offline maps.
- Load waypoints.
- Pack food by day.
- Check the first-aid pouch.
- Place bear spray in an accessible location.
- Protect licenses and tags in waterproof storage.
- Tell your emergency contact the final route.
- Check that every hunter carries their own emergency kit.
At the trailhead
- Send the final departure message.
- Photograph the vehicle and odometer if useful.
- Confirm the return deadline.
- Check weather and warnings again.
- Inspect boots, packs and weapon carry systems.
- Ensure everyone knows the meeting point.
- Leave unnecessary weight behind, but never remove safety essentials.
Questions Hunters Commonly Ask
How much survival gear should a backcountry hunter carry?
Carry enough to remain warm, hydrated, sheltered and locatable until help arrives. The correct amount depends on season, distance, group size and terrain. A lightweight summer day hunt may need a compact personal kit, while a late-season mountain trip requires a full shelter, insulation and emergency communication system.
Is a satellite communicator necessary if I hunt with a group?
Yes, especially where cell coverage is unreliable. Groups can become separated, and an injury may affect the person carrying the only device. At least one reliable communication device should be available, while every hunter should know how to use it.
Can I sleep in my hunting clothes?
You can, but it is usually a poor strategy when clothing is damp or contaminated with sweat. Keep a dry base layer and dry socks for sleeping. Staying dry improves warmth and makes the next morning safer.
How far should meat be stored from camp?
The exact distance depends on terrain, regulations and the available hanging locations. The central rule is to keep meat, hide, entrails and cooking smells away from the sleeping area. Never store game inside a tent.
What is the most important item in a wilderness emergency?
No single tool replaces preparation. A reliable shelter, insulation, water treatment, navigation method and communication device provide more practical protection than a novelty survival gadget. Training and sound decisions remain the most important factors.
Should hunters carry a firearm for bear protection?
Hunting firearms are not a substitute for bear-awareness practices or bear spray. Follow Canadian and provincial laws, maintain safe firearm handling, and carry bear spray where it can be deployed quickly. Always review local wildlife guidance before entering the field.
How much extra food should I pack?
A full extra day is a sensible baseline for many multi-day trips, but remote or weather-sensitive expeditions may require more. Increase the margin for slow travel, heavy pack-outs, injury risk and delayed aircraft or vehicle access.
What should I do if bad weather arrives at camp?
Stop and stabilize the situation before making a decision. Add insulation, secure the shelter, protect fuel and communication devices, eat and hydrate, then reassess visibility, wind, temperature and the route. Do not begin a difficult descent or river crossing simply because the original schedule says it is time to leave.
Final Takeaway
The strongest backcountry hunting plan is simple enough to follow under stress. Carry independent emergency essentials, protect yourself from cold and wet conditions, treat every water source, maintain a reliable route plan, keep meat away from sleeping areas, and communicate before a problem becomes an emergency.
Canadian wilderness rewards preparation. A lighter pack is useful, but a missing shelter, dead battery or inadequate clothing can turn a routine hunt into a rescue situation. Build your system around the environment, practice using every item and leave a clear plan with someone who will act if you do not return.
- Canada Hunting Youth Regulations 2026–2027: Age Requirements, Licences & Hunter Rules by Province - October 10, 2026
- Where to Hunt in Canada: Provinces, Species & Planning Guide - October 10, 2026
- Hunting Tags in Canada: Validation, Attachment and Transport Rules Every Hunter Must Know - October 5, 2026